
在Spring Boot中集成Stripe的指南

随着数字交易的兴起,无缝集成支付网关的能力已成为开发人员的一项重要技能。无论是市场还是 ,支付处理器对于收集和处理用户付款都至关重要。
本文将介绍如何在 环境中集成 ,如何设置订阅、提供免费试用以及为客户构建自助服务页面以下载付款发票。
什么是 stripe?
是全球知名的支付处理平台,在 提供服务。如果您想在自己的 *** 应用程序中集成支付功能,Stripe 是一个不错的选择,因为它覆盖范围广、声誉好、文档详尽。
了解常见的 Stripe 概念
了解 Stripe 用于协调和执行多方支付操作的一些常用概念很有帮助。Stripe 提供两种在应用程序中实现支付集成的 *** 。
您可以在应用程序中嵌入 Stripe 表单,以获得应用程序内的客户体验(),或者将客户重定向到 Stripe 托管的支付页面,由 Stripe 管理流程,并在支付成功或失败时通知您的应用程序()。
支付意图
处理付款时,在提示客户提供银行卡信息和付款之前,必须事先收集客户和产品的详细信息。这些详细信息包括描述、总金额、付款方式等。
Stripe 要求您在应用程序中收集这些详细信息,并在其后台生成 PaymentIntent 对象。这种 *** 能让 Stripe 为该意图制定一个支付请求。付款结束后,您可以通过 PaymentIntent 对象持续检索付款详细信息,包括付款目的。
支付链接
为了避免将 Stripe 直接集成到代码库中的复杂性,可以考虑使用 作为托管支付解决方案。就像创建 PaymentIntent 一样,你将创建一个包含付款和客户详细信息的 CheckoutSession 。 CheckoutSession 不会启动应用程序内的 PaymentIntent ,而是生成一个付款链接,将客户重定向到该链接。这就是托管支付页面的样子:
Stripe 托管的结账页面
付款后,Stripe 会重定向回到您的应用程序,从而实现确认和交付请求等付款后任务。为确保可靠性,可配置一个后台 *** 钩子来更新 Stripe,即使客户在付款后不小心关闭了页面,也能确保保留付款数据。
这种 *** 虽然有效,但在定制和设计方面缺乏灵活性。对于移动应用程序来说,正确设置这种 *** 也很棘手,因为原生集成看起来会更无缝。
API Keys
API 密钥使用 Stripe API 时,您需要访问 API 密钥,以便客户端和服务器应用程序与 Stripe 后台进行交互。您可以在 *** 问您的 Stripe API 密钥。如下所示

显示 API 密钥的 Stripe 面板
Stripe 支付如何运作?
要了解 Stripe 支付是如何运作的,你需要了解所有相关方。每笔支付交易都涉及四个利益相关者:
- 客户:打算为服务/产品付款的人。
- 商家:您,企业主,负责收款和销售服务/产品。
- 收款方:代表你(商家)处理付款并将你的付款请求转给客户银行的银行。收单银行可能会与第三方合作帮助处理付款。
- 发卡银行:向消费者提供信贷、发行银行卡和其他支付方式的银行。
以下是这些利益相关者之间典型的支付流程。

在线支付如何运作
顾客让商家知道他们愿意付款。然后,商户将与付款有关的详细信息转发给收单银行,收单银行从客户的发卡银行收取付款,并通知商户付款成功。
这是支付流程的一个非常高层次的概述。作为商家,您只需关注收集支付意向、将其传递给支付处理商以及处理支付结果。不过,正如前面所讨论的,有两种 *** 可以实现这一点。
在创建 Stripe 管理的结账会话时,Stripe 会负责收集支付详情,以下是典型的流程:

Stripe 托管结账支付工作流程 (Source: )
有了自定义支付流程,一切就真的取决于你了。您可以根据自己应用程序的需要设计客户端、服务器、客户和 Stripe API 之间的交互。您可以根据需要在此工作流中添加地址收集、发票生成、取消、免费试用等功能。
现在,您已经了解了 Stripe 支付的工作原理,可以开始在您的 Java 应用程序中构建它了。
在 Spring Boot 应用程序中集成 Stripe
要开始 Stripe 集成,请创建一个前端应用程序与 Java 后台交互并启动支付。在本教程中,您将构建一个 React 应用程序来触发各种支付类型和订阅,从而清楚地了解它们的机制。
注:本教程不包括构建一个完整的电子商务网站;它的主要目的是指导您完成将 Stripe 集成到 Spring Boot 的简单过程。
设置前端和后端项目
通过运行以下命令,使用 Vite 创建一个新目录并构建一个 React 项目:
npm create vite@latest
将项目名称设为 frontend(或任何首选名称),框架设为 React,变量设为 TypeScript。导航至项目目录,运行以下命令安装 Chakra UI,以便快速为 UI 元素搭建脚手架:
npm i @chakra-ui/react @emotion/react @emotion/styled framer-motion @chakra-ui/icons
运行下面的命令,还可以在项目中安装 react-router-dom ,用于客户端路由:
npm i react-router-dom
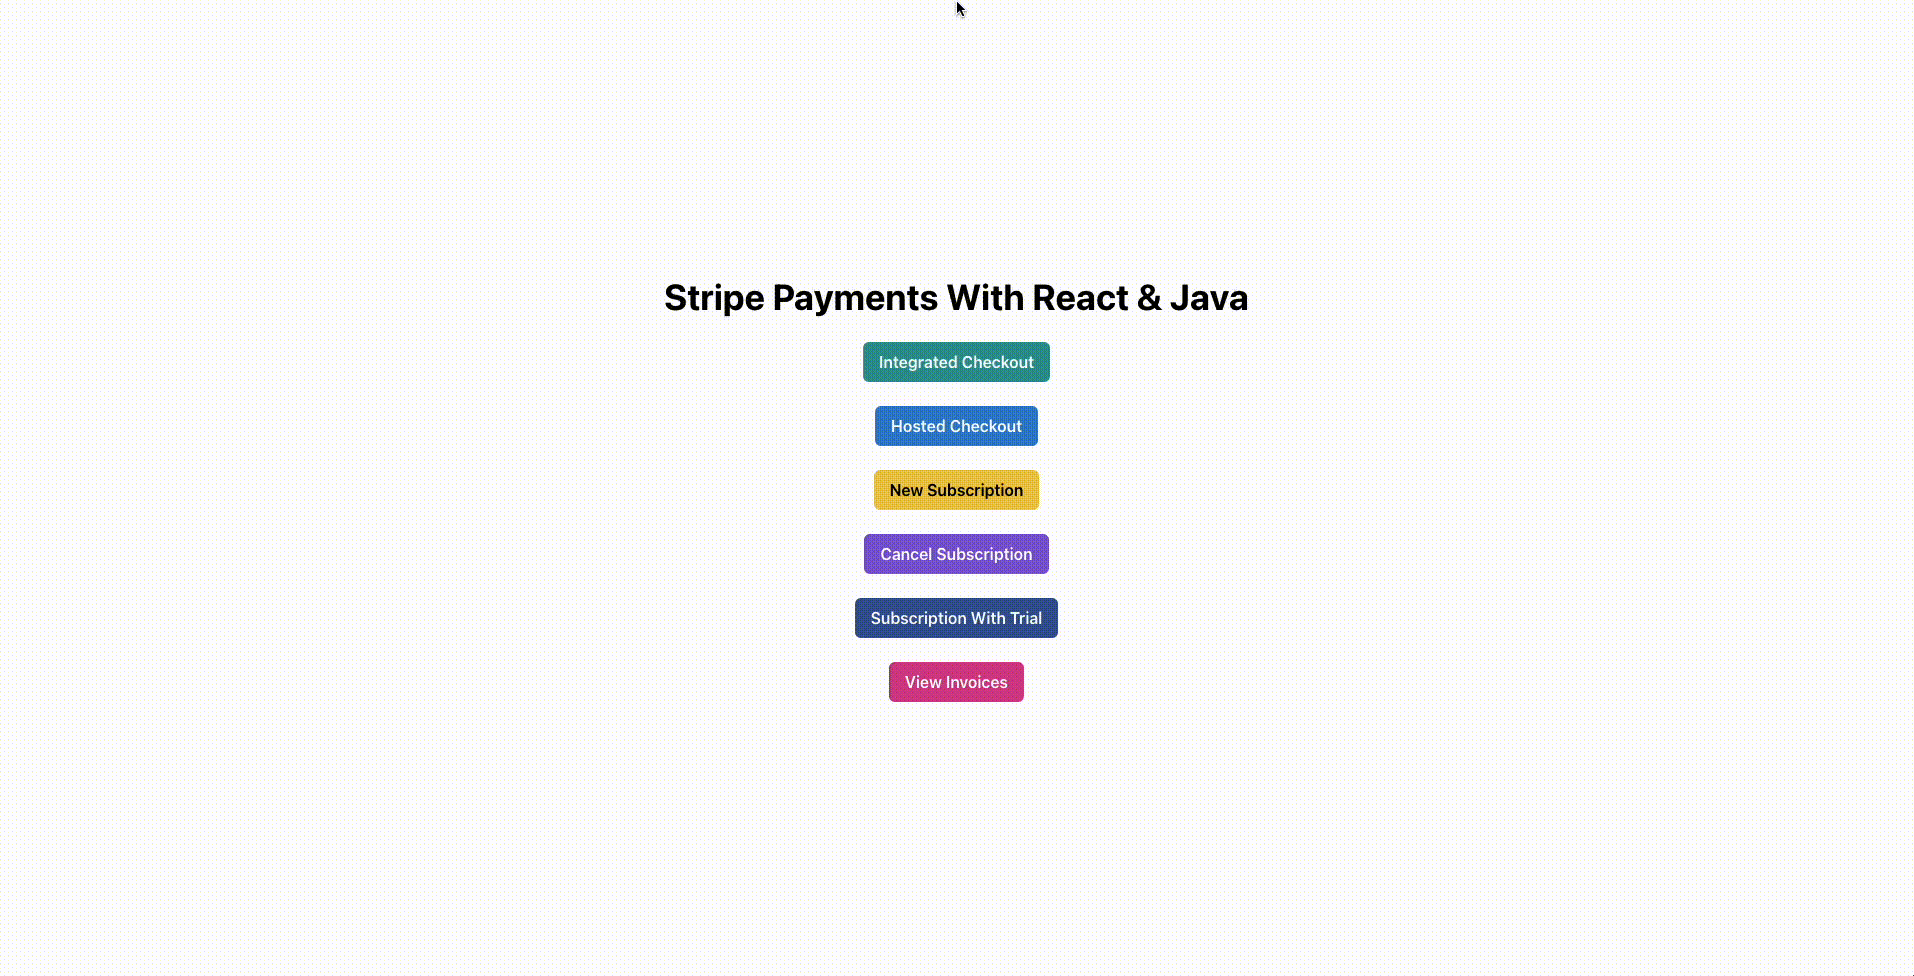
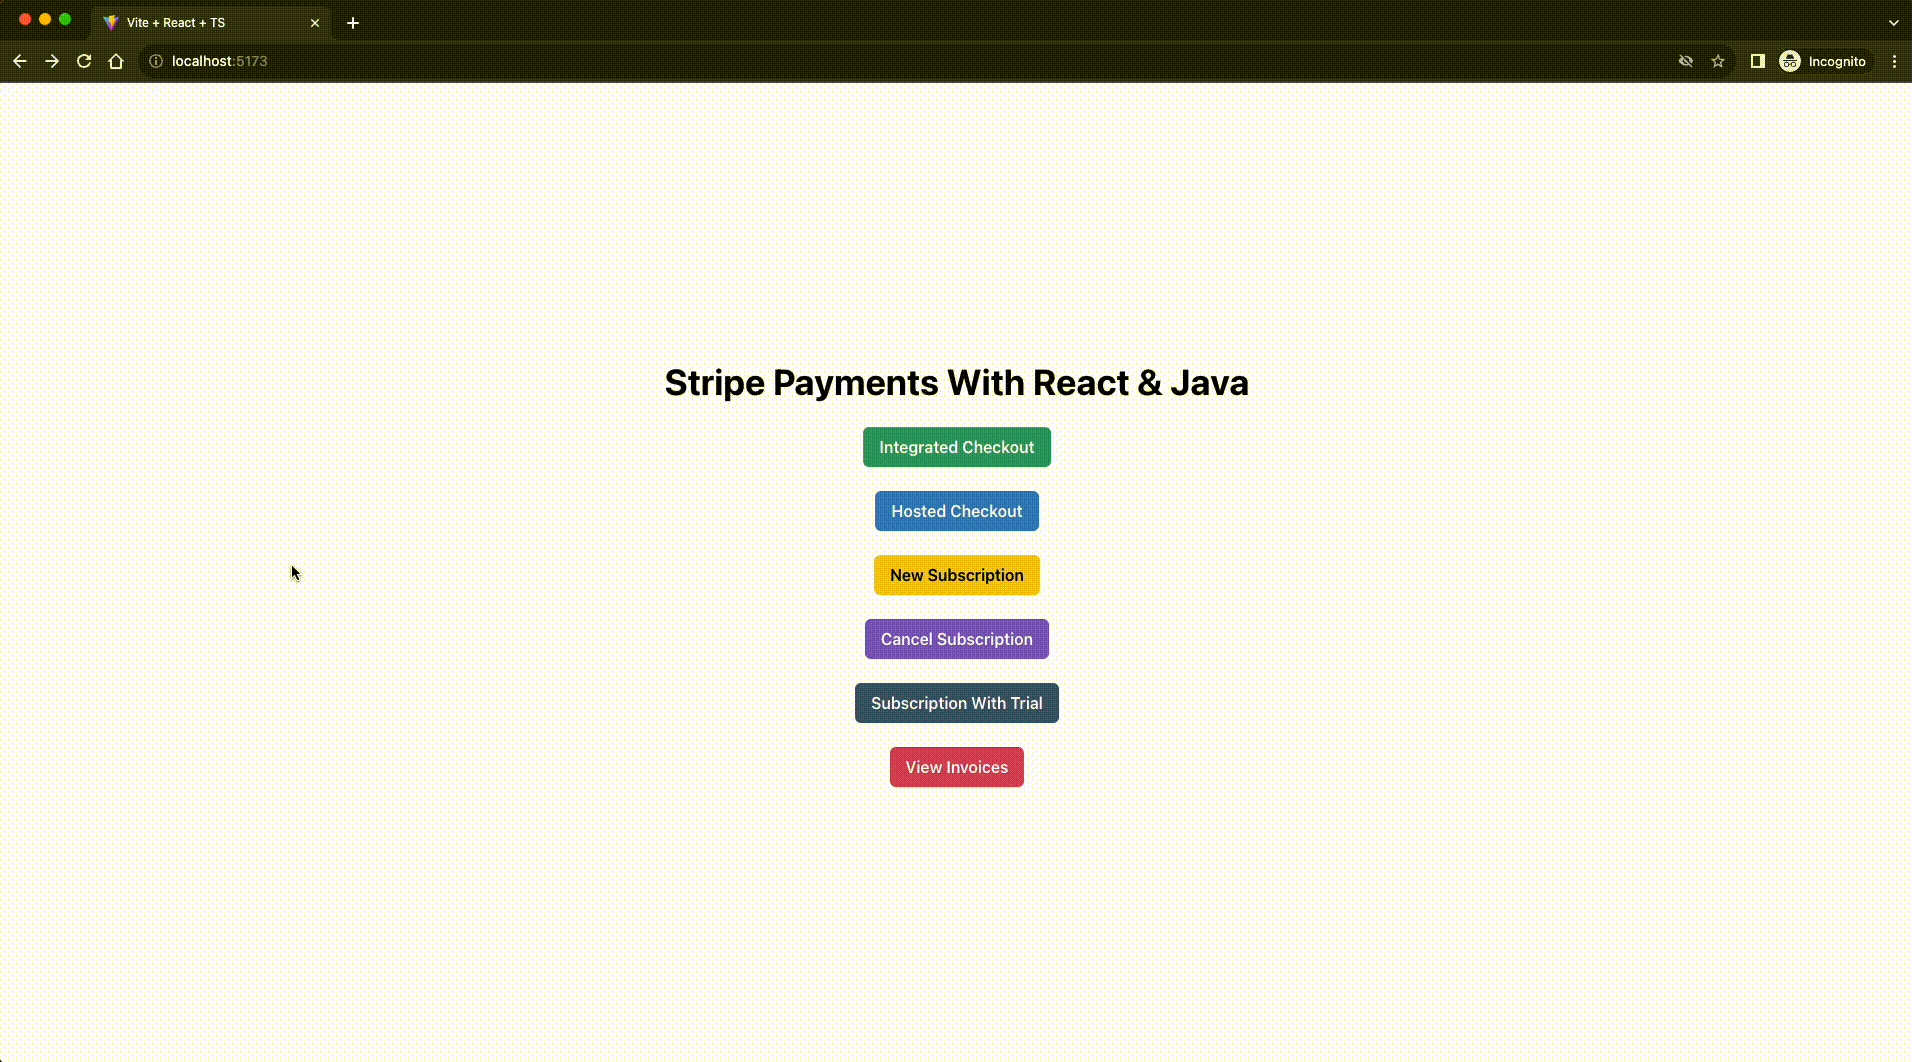
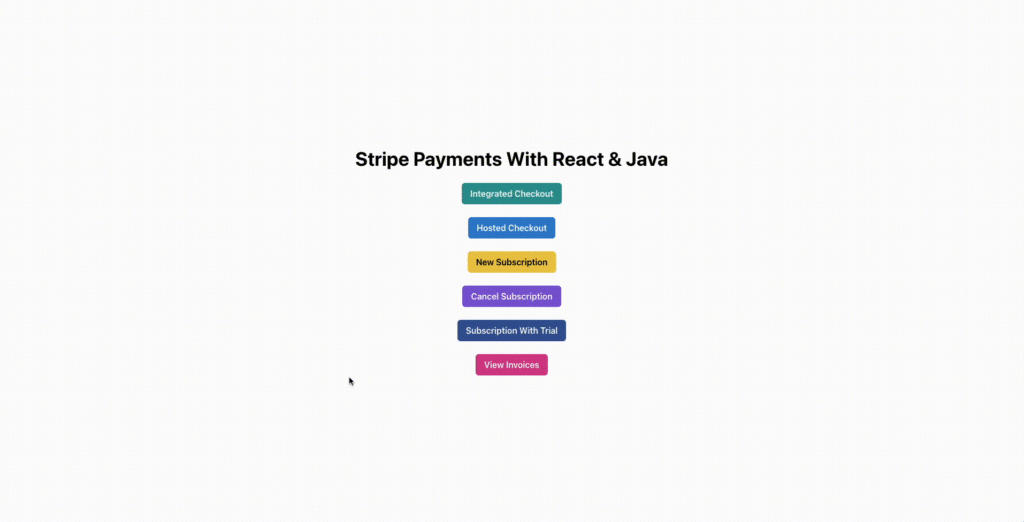
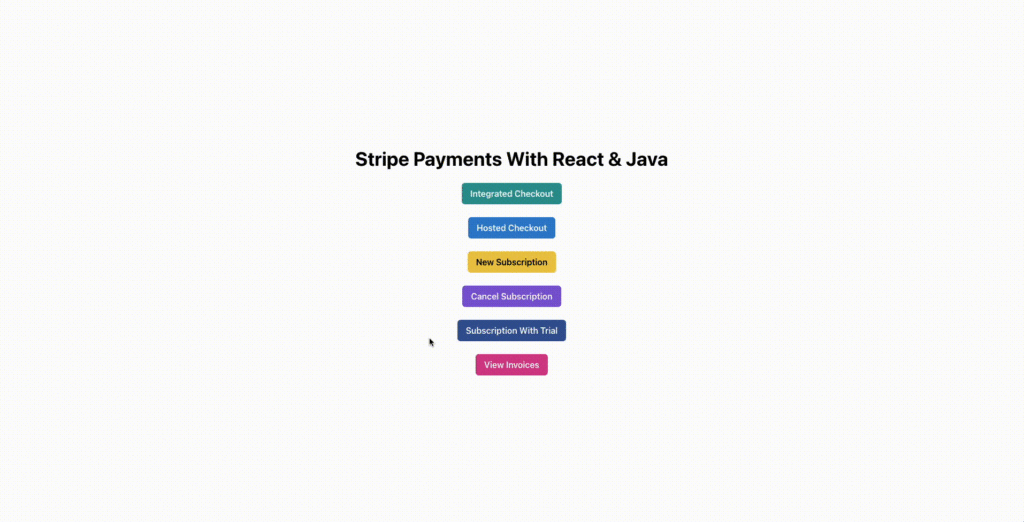
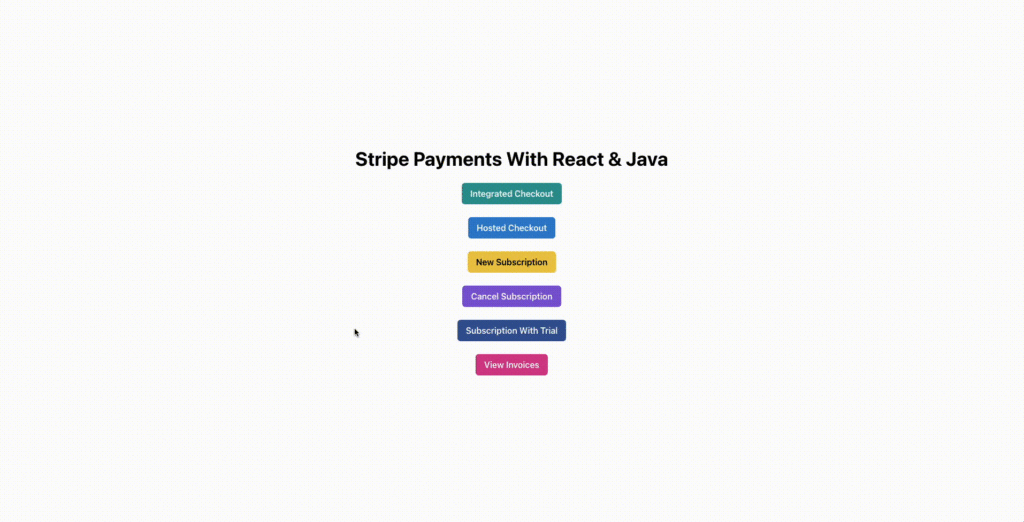
现在,您可以开始构建前端应用程序了。下面是您要构建的主页。

已完成的前端应用程序主页
点击该页面上的任何按钮,都将进入带有支付表单的独立结账页面。首先,在 frontend/src 目录中新建一个名为 routes 的文件夹。在这个文件夹中,创建一个 Home.tsx 文件。该文件将包含应用程序主页路由 ( / ) 的代码。将以下代码粘贴到文件中:
import {Button, Center, Heading, VStack} from "@chakra-ui/react";
import { useNavigate } from "react-router-dom";
function Home() {
const navigate = useNavigate()
const navigateToIntegratedCheckout = () => {
navigate("/integrated-checkout")
}
const navigateToHostedCheckout = () => {
navigate("/hosted-checkout")
}
const navigateToNewSubscription = () => {
navigate("/new-subscription")
}
const navigateToCancelSubscription = () => {
navigate("/cancel-subscription")
}
const navigateToSubscriptionWithTrial = () => {
navigate("/subscription-with-trial")
}
const navigateToViewinvoices = () => {
navigate("/view-invoices")
}
return (
<>
<Center h={'100vh'} color='black'>
<VStack spacing='24px'>
<Heading>Stripe Payments With React & Java</Heading>
<Button
colorScheme={'teal'}
onClick={navigateToIntegratedCheckout}>
Integrated Checkout
</Button>
<Button
colorScheme={'blue'}
onClick={navigateToHostedCheckout}>
Hosted Checkout
</Button>
<Button
colorScheme={'yellow'}
onClick={navigateToNewSubscription}>
New Subscription
</Button>
<Button
colorScheme={'purple'}
onClick={navigateToCancelSubscription}>
Cancel Subscription
</Button>
<Button
colorScheme={'facebook'}
onClick={navigateToSubscriptionWithTrial}>
Subscription With Trial
</Button>
<Button
colorScheme={'pink'}
onClick={navigateToViewInvoices}>
View Invoices
</Button>
</VStack>
</Center>
</>
)
}
export default Home
要在应用程序中启用导航功能,请更新 app.tsx 文件,配置 react-router-dom 中的 RouteProvider 类。
import Home from "./routes/Home.tsx";
import {
createBrowserRouter,
RouterProvider,
} from "react-router-dom";
function App() {
const router = createBrowserRouter([
{
path: "/",
element: (
<Home/>
),
},
]);
return (
<RouterProvider router={router}/>
)
}
export default App
运行 npm run dev 命令,在 https://localhost:5173 上预览应用程序。
至此,前台应用程序所需的初始设置完成。接下来,使用 Spring Boot 创建后端应用程序。要初始化应用程序,可以使用 网站(如果 IDE 支持创建 Spring 应用程序,则无需使用该网站)。
intelliJ IDEA 支持创建 Spring Boot 应用程序。首先在 IntelliJ IDEA 上选择 “New Project” 选项。然后,在左侧窗格中选择 Spring Initializr。输入后端项目的详细信息:名称(backend)、位置(stripe-payments-java 目录)、语言(Java)和类型(Maven)。对于组名和工件名,请分别使用 com.kinsta.stripe-java 和 backend。

IDEA 新项目对话框
单击 “Next” 按钮。然后,在 “依赖关系” 窗格的 “Web” 下拉菜单中选择 Spring Web,为项目添加依赖关系,并单击 “Create” 按钮。

选择依赖项
这将创建 Java 项目并在集成开发环境中打开。现在,您可以使用 Stripe 创建各种结账流程。
接受在线产品购买付款
Stripe 最重要、使用最广泛的功能是接受客户的一次性付款。在本节中,您将学习在应用程序中使用 Stripe 集成支付处理的两种 *** 。
托管结账
首先,您需要创建一个可触发托管支付工作流的结账页面,在该工作流中,您只需从前端应用程序触发支付。然后,Stripe 负责收集客户的银行卡信息并收取付款,最后只共享付款操作的结果。
这就是结账页面的样子:
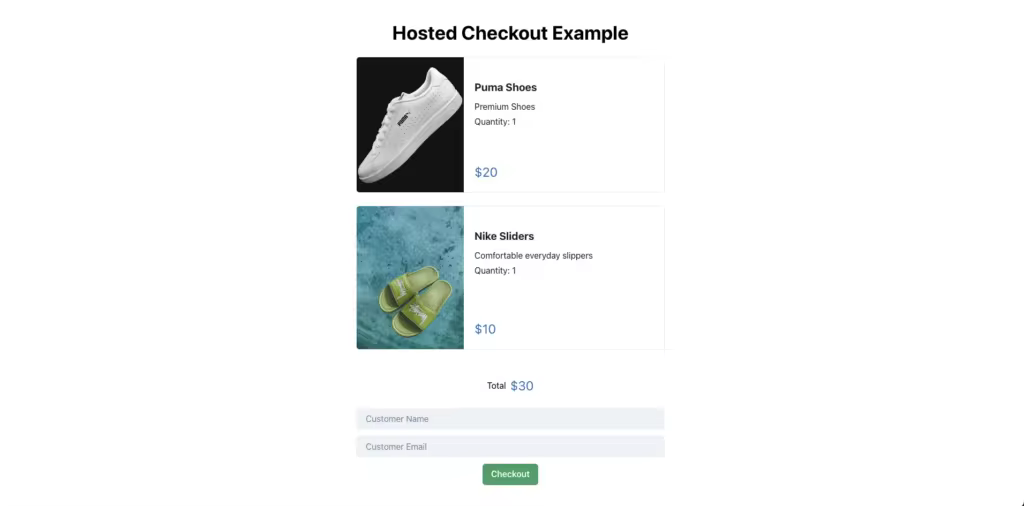
完成托管结账页面
该页面有三个主要组件: CartItem – 表示每个购物车项目; TotalFooter – 显示总金额; CustomerDetAIls – 收集客户详细信息。您可以重复使用这些组件,为本文中的其他场景(如集成结账和订阅)创建结账表单。
构建前台
在 frontend/src 目录中创建一个 components 文件夹。在 components 文件夹中,创建一个新文件 CartItem.tsx,并粘贴以下代码:
import {Button, Card, CardBody, CardFooter, Heading, Image, Stack, Text, VStack} from "@chakra-ui/react";
function CartItem(props: CartItemProps) {
return <Card direction={{base: 'column',  *** : 'row'}}
overflow='hidden'
width={'xl'}
variant='outline'>
<Image
objectFit='cover'
maxW={{base: '100%',  *** : '200px'}}
src={props.data.image}
/>
<Stack mt='6' spacing='3'>
<CardBody>
<VStack spacing={'3'} alignItems={"flex-start"}>
<Heading size='md'>{props.data.name}</Heading>
<VStack spacing={'1'} alignItems={"flex-start"}>
<Text>
{props.data.description}
</Text>
{(props.mode === "checkout" ? <Text>
{"Quantity: " + props.data.quantity}
</Text> : <></>)}
</VStack>
</VStack>
</CardBody>
<CardFooter>
<VStack alignItems={'flex-start'}>
<Text color='blue.600' fontSize='2xl'>
{"$" + props.data.price}
</Text>
</VStack>
</CardFooter>
</Stack>
</Card>
}
export interface ItemData {
name: string
price: number
quantity: number
image: string
description: string
id: string
}
interface CartItemProps {
data: ItemData
mode: "subscription" | "checkout"
onCancelled?: () => void
}
export default CartItem
上面的代码定义了两个接口,作为传递给组件的属性类型。 ItemData 类型可导出,以便在其他组件中重复使用。
代码将返回购物车项目组件的布局。它利用提供的道具在屏幕上呈现项目。
接下来,在 components 目录中创建一个 TotalFooter.tsx 文件,并粘贴以下代码:
import {Divider, HStack, Text} from "@chakra-ui/react";
function TotalFooter(props: TotalFooterProps) {
return <>
<Divider />
<HStack>
<Text>Total</Text>
<Text color='blue.600' fontSize='2xl'>
{"$" + props.total}
</Text>
</HStack>
{props.mode === "subscription" &&
<Text fontSize={"xs"}>(Monthly, starting today)</Text>
}
{props.mode === "trial" &&
<Text fontSize={"xs"}>(Monthly, starting next month)</Text>
}
</>
}
interface TotalFooterProps {
total: number
mode: "checkout" | "subscription" | "trial"
}
export default TotalFooter
TotalFooter 组件显示购物车的总价值,并使用 mode 值特定文本。
最后,创建 CustomerDetails.tsx 组件并粘贴以下代码:
import {ItemData} from "./CartItem.tsx";
import {Button, Input, VStack} from "@chakra-ui/react";
import {useState} from "react";
function CustomerDetails(props: CustomerDetailsProp) {
const [name, setName] = useState("")
const [email, setEmail] = useState("")
const onCustomerNameChange = (ev: React.ChangeEvent<HTMLInputElement>) => {
setName(ev.target.value)
}
const onCustomerEmailChange = (ev: React.ChangeEvent<HTMLInputElement>) => {
setEmail(ev.target.value)
}
const initiatePayment = () => {
fetch(process.env.VITE_SERVER_BASE_URL + props.endpoint, {
method: "POST",
headers: {'Content-Type': 'application/json'},
body: jsON.stringify({
items: props.data.map(elem => ({name: elem.name, id: elem.id})),
customerName: name,
customerEmail: email,
})
})
.then(r => r.text())
.then(r => {
window.location.href = r
})
}
return <>
<VStack spacing={3} width={'xl'}>
<Input variant='filled' placeholder='Customer Name' onChange={onCustomerNameChange} value={name}/>
<Input variant='filled' placeholder='Customer Email' onChange={onCustomerEmailChange} value={email}/>
<Button onClick={initiatePayment} colorScheme={'green'}>Checkout</Button>
</VStack>
</>
}
interface CustomerDetailsProp {
data: ItemData[]
endpoint: string
}
export default CustomerDetails
上面的代码显示了一个带有两个输入框的表单–用于收集用户的姓名和电子邮件。点击 Checkout 按钮后,将调用 initiatePayment *** 向后台发送结账请求。
它会请求您传递给组件的端点,并将客户信息和购物车项目作为请求的一部分发送,然后将用户重定向到从服务器接收到的 URL。该 URL 将引导用户进入 Stripe 服务器上的结账页面。稍后我们将介绍如何创建该 URL。
注:此组件使用环境变量 VITE_SERVER_BASE_URL 来设置后端服务器 URL。请在项目根目录下创建 .env 文件进行设置:
VITE_SERVER_BASE_URL=http://localhost:8080
所有组件都已创建。现在,让我们使用这些组件创建托管结账路由。为此,请在 routes 文件夹中创建一个新的 HostedCheckout.tsx 文件,代码如下:
import {Center, Heading, VStack} from "@chakra-ui/react";
import {useState} from "react";
import CartItem, {ItemData} from "../components/CartItem.tsx";
import TotalFooter from "../components/TotalFooter.tsx";
import CustomerDetails from "../components/CustomerDetails.tsx";
import {Products} from '../data.ts'
function HostedCheckout() {
const [items] = useState<ItemData[]>(Products)
return <>
<Center h={'100vh'} color='black'>
<VStack spacing='24px'>
<Heading>Hosted Checkout Example</Heading>
{items.map(elem => {
return <CartItem data={elem} mode={'checkout'}/>
})}
<TotalFooter total={30} mode={"checkout"}/>
<CustomerDetails data={items} endpoint={"/checkout/hosted"} mode={"checkout"}/>
</VStack>
</Center>
</>
}
export default HostedCheckout
此路由使用刚才构建的三个组件来组装一个结账屏幕。所有组件模式都配置为 checkout,并向表单组件提供了 /checkout/hosted 端点,以便准确地启动结账请求。
该组件使用 Products 对象来填充项目数组。在实际应用中,该数据来自购物车 API,其中包含用户选择的项目。不过,在本教程中,数组是由脚本中的静态列表填充的。在前端项目的根目录下创建一个 data.ts 文件,并在其中存储以下代码,从而定义数组:
import {ItemData} from "./components/CartItem.tsx";
export const Products: ItemData[] = [
{
description: "Premium Shoes",
image: "https://source.unsplash.com/NUoPWImmjCU",
name: "Puma Shoes",
price: 20,
quantity: 1,
id: "shoe"
},
{
description: "Comfortable everyday slippers",
image: "https://source.unsplash.com/K_gIPI791Jo",
name: "Nike Sliders",
price: 10,
quantity: 1,
id: "slippers"
},
]
该文件定义了购物车中呈现的产品数组中的两个项目。您可以随意调整产品的值。
作为构建前端的最后一步,创建两个新路由来处理成功和失败。Stripe 托管的结账页面将根据交易结果,通过这两条路由将用户重定向到您的应用程序。Stripe 还会为您的路由提供与交易相关的有效载荷,例如结账会话 ID,您可以用它来,并访问付款方式、发票详情等结账相关数据。
为此,请在 src/routes 目录中创建 Success.tsx 文件,并保存以下代码:
import {Button, Center, Heading, Text, VStack} from "@chakra-ui/react";
import {useNavigate} from "react-router-dom";
function Success() {
const queryParams = new URLSearchParams(window.location.search)
const navigate = useNavigate()
const onButtonClick = () => {
navigate("/")
}
return <Center h={'100vh'} color='green'>
<VStack spacing={3}>
<Heading fontSize={'4xl'}>Success!</Heading>
<Text color={'black'}>{queryParams.toString().split("&").join("\n")}</Text>
<Button onClick={onButtonClick} colorScheme={'green'}>go Home</Button>
</VStack>
</Center>
}
export default Success
渲染时,该组件会显示 “Success!” 消息,并在屏幕上打印任何 URL 查询参数。它还包括一个将用户重定向到应用程序主页的按钮。
在构建现实世界的应用程序时,该页面是您处理非关键应用程序侧事务的地方,这些事务取决于手头交易的成功与否。例如,如果您正在为一家在线商店创建一个结账页面,您可以使用该页面向用户显示确认信息以及所购产品的交付时间。
接下来,创建一个 Failure.tsx 文件,其中包含以下代码:
import {Button, Center, Heading, Text, VStack} from "@chakra-ui/react";
import {useNavigate} from "react-router-dom";
function Failure() {
const queryParams = new URLSearchParams(window.location.search)
const navigate = useNavigate()
const onButtonClick = () => {
navigate("/")
}
return <Center h={'100vh'} color='red'>
<VStack spacing={3}>
<Heading fontSize={'4xl'}>Failure!</Heading>
<Text color={'black'}>{queryParams.toString().split("&").join("\n")}</Text>
<Button onClick={onButtonClick} colorScheme={'red'}>Try Again</Button>
</VStack>
</Center>
}
export default Failure
该组件与 Success.tsx 类似,在渲染时显示 “Failure!”信息。
提示:避免在成功或失败页面上传递关键信息或执行关键操作,因为如果客户关闭浏览器标签或失去连接,他们可能永远无法进入这两个页面。
对于产品交付、发送电子邮件或购买流程的任何关键部分等重要任务,请使用。 *** 钩子是 Stripe 在交易发生时可以调用的服务器上的 API 路由。
*** 钩子接收完整的交易详细信息(通过 CheckoutSession 对象),允许您将其记录到应用程序数据库中,并触发相应的成功或失败工作流。由于 Stripe 可以随时访问您的服务器,因此不会遗漏任何交易,从而确保了在线商店功能的一致性。
最后,更新 App.tsx 文件,使其看起来像这样:
import Home from "./routes/Home.tsx";
import {createBrowserRouter, RouterProvider,} from "react-router-dom";
import HostedCheckout from "./routes/HostedCheckout.tsx";
import Success from "./routes/Success.tsx";
import Failure from "./routes/Failure.tsx";
function App() {
const router = createBrowserRouter([
{
path: "/",
element: (
<Home/>
),
},
{
path: "/hosted-checkout",
element: (
<HostedCheckout/>
)
},
{
path: '/success',
element: (
<Success/>
)
},
{
path: '/failure',
element: (
<Failure/>
)
},
]);
return (
<RouterProvider router={router}/>
)
}
export default App
这将确保 Success 和 Failure 组件分别在 /success 和 /failure 路由上呈现。
至此,前台设置完成。接下来,设置后端以创建 /checkout/hosted 端点。
构建后端
打开后端项目,在 pom.xml 文件的依赖关系数组中添加以下几行,安装 Stripe SDK:
        <dependency>
<groupId>com.stripe</groupId>
<artifactId>stripe-java</artifactId>
<version>22.29.0</version>
</dependency>
接下来,在项目中以安装依赖项。如果你的集成开发环境不支持通过用户界面安装,可执行 maven dependency:reSOLve 或 maven install 命令。如果没有 maven CLI,可在创建项目时使用 Spring initializr 中的 mvnw 封装器。
安装好依赖项后,创建一个新的 REST 控制器来处理后端应用程序传入的 HTTP 请求。为此,请在 src/main/java/com/kinsta/stripe-java/backend 目录中创建 PaymentController.java 文件,并添加以下代码:
package com.kinsta.stripejava.backend;
import com.stripe.Stripe;
import com.stripe.exception.StripeException;
import com.stripe.model.Customer;
import com.stripe.model.Product;
import com.stripe.model.checkout.Session;
import com.stripe.param.checkout.SessionCreateParams;
import com.stripe.param.checkout.SessionCreateParams.LineItem.PriceData;
import org.springframework.web.bind.annotation.CrossOrigin;
import org.springframework.web.bind.annotation.PostMapping;
import org.springframework.web.bind.annotation.RequestBody;
import org.springframework.web.bind.annotation.RestController;
@RestController
@CrossOrigin
public class PaymentController {
String STRIPE_API_KEY = System.getenv().get("STRIPE_API_KEY");
@PostMapping("/checkout/hosted")
String hostedCheckout(@RequestBody RequestDTO requestDTO) throws StripeException {
return "Hello World!";
}
}
上面的代码导入了 Stripe 的基本依赖项,并建立了 PaymentController 类。该类带有两个注解: @RestController 和 @CrossOrigin 。 @RestController 注解指示 Spring Boot 将该类视为控制器,其 *** 现在可以使用 @Mapping 注解来处理传入的 HTTP 请求。
@CrossOrigin 注解将该类中定义的所有端点标记为根据 CORS 规则向所有起源开放。不过,由于各种互联网域可能存在安全漏洞,因此在生产中不鼓励采用这种做法。
为了达到更佳效果,建议将后端和前端服务器托管在同一域名上,以规避 CORS 问题。如果不可行,也可以使用 @CrossOrigin 注解指定前端客户端(向后端服务器发送请求)的域,如下所示:
@CrossOrigin(origins = "http://frontend.com")
PaymentController 类将从环境变量中提取 Stripe API 密钥,以便稍后提供给 Stripe SDK。运行应用程序时,必须通过环境变量向应用程序提供 Stripe API 密钥。
在本地,你可以在系统中创建一个新的环境变量,可以是临时性的(在启动开发服务器的命令前添加 KEY=VALUE 短语),也可以是永久性的(更新终端的配置文件或在 windows 的控制面板中设置环境变量)。
在生产环境中,部署提供商会为您提供一个单独的选项来填写应用程序使用的环境变量。
如果您使用的是 IntelliJ IDEA(或类似的集成开发环境),请单击集成开发环境右上角的 “Run Configurations“,然后从打开的下拉列表中单击 “Edit Configurations…“选项,更新运行命令并设置环境变量。
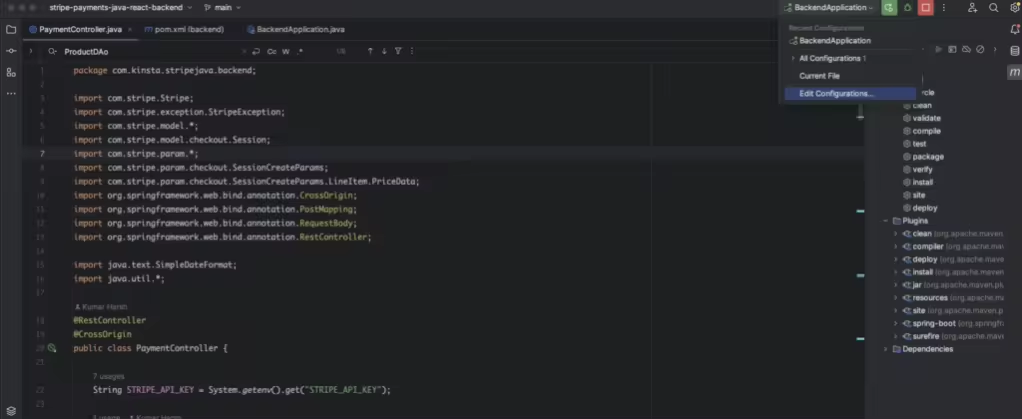
打开运行/调试配置对话框
这将打开一个对话框,您可以使用 Environment variables 字段为应用程序提供环境变量。输入环境变量 STRIPE_API_KEY ,格式为 VAR1=VALUE 。你可以在 上找到你的 API 密钥。您必须从该页面提供 Secret Key 的值。
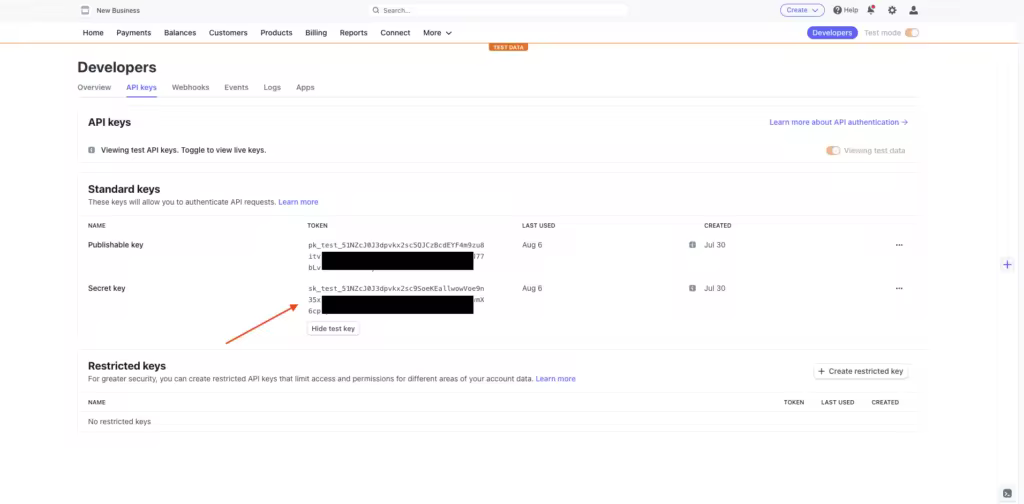
显示 API 密钥的 Stripe 面板
如果还没有,请,以获取 API 密钥。
设置好 API 密钥后,继续创建端点。该端点将收集客户数据(姓名和电子邮件),在 Stripe 中为他们创建一个客户档案(如果还不存在),并创建一个 (结账会话),让用户为购物车中的物品付款。
以下是 hostedCheckout *** 的代码:
    @PostMapping("/checkout/hosted")
String hostedCheckout(@RequestBody RequestDTO requestDTO) throws StripeException {
Stripe.apiKey = STRIPE_API_KEY;
String clientBaseURL = System.getenv().get("CLIENT_BASE_URL");
// Start by finding an existing customer record from Stripe or creating a new one if needed
Customer customer = CustomerUtil.findOrCreateCustomer(requestDTO.getCustomerEmail(), requestDTO.getCustomerName());
// Next, create a checkout session by adding the details of the checkout
SessionCreateParams.Builder paramsBuilder =
SessionCreateParams.builder()
.setMode(SessionCreateParams.Mode.PAYMENT)
.setCustomer(customer.getId())
.setSuccessUrl(clientBaseURL + "/success?session_id={CHECKOUT_SESSION_ID}")
.setCancelUrl(clientBaseURL + "/failure");
for (Product product : requestDTO.getItems()) {
paramsBuilder.addLineItem(
SessionCreateParams.LineItem.builder()
.setQuantity(1L)
.setPriceData(
PriceData.builder()
.setProductData(
PriceData.ProductData.builder()
.putmetadata("app_id", product.getId())
.setName(product.getName())
.build()
)
.setCurrency(ProductDAO.getProduct(product.getId()).getDefaultPriceobject().getCurrency())
.setUnitAmountDecimal(ProductDAO.getProduct(product.getId()).getDefaultPriceObject().getUnitAmountDecimal())
.build())
.build());
}
}
Session session = Session.create(paramsBuilder.build());
return session.getUrl();
}
在建立结账会话时,代码会使用从客户端收到的产品名称,但不会使用请求中的价格详情。这种 *** 避免了潜在的客户端价格操纵,恶意行为者可能会在结账请求中发送降低的价格,从而以较低的价格购买产品和服务。
为防止这种情况,hostedCheckout *** 会查询产品数据库(通过 ProductDAO )以获取正确的项目价格。
此外,Stripe 还按照生成器设计模式提供了各种 Builder 类。这些类有助于为 Stripe 请求创建参数对象。提供的代码片段还引用了环境变量来获取客户端应用程序的 URL。付款成功或失败后,结账会话对象要适当重定向,就必须使用该 URL。
要执行这段代码,请通过环境变量设置客户端应用程序的 URL,与提供 Stripe API 密钥的方式类似。由于客户端应用是通过 Vite 运行的,因此本地应用 URL 应为 http://localhost:5173。请通过集成开发环境、终端或系统控制面板将其纳入环境变量。
CLIENT_BASE_URL=http://localhost:5173
此外,还要为应用程序提供 ProductDAO ,以便从中查找产品价格。数据访问对象(DAO)与数据源(如数据库)交互,以访问与应用程序相关的数据。虽然建立产品数据库不在本教程的范围之内,但您可以做的一个简单实现 *** 是在与 PaymentController.java 相同的目录下添加一个新文件 ProductDAO.java,并粘贴以下代码:
package com.kinsta.stripejava.backend;
import com.stripe.model.Price;
import com.stripe.model.Product;
import java.math.BigDecimal;
public class ProductDAO {
static Product[] products;
static {
products = new Product[4];
Product sampleProduct = new Product();
Price samplePrice = new Price();
sampleProduct.setName("Puma Shoes");
sampleProduct.setId("shoe");
samplePrice.setCurrency("usd");
samplePrice.setUnitAmountDecimal(BigDecimal.valueOf(2000));
sampleProduct.setDefaultPriceObject(samplePrice);
products[0] = sampleProduct;
sampleProduct = new Product();
samplePrice = new Price();
sampleProduct.setName("Nike Sliders");
sampleProduct.setId("slippers");
samplePrice.setCurrency("usd");
samplePrice.setUnitAmountDecimal(BigDecimal.valueOf(1000));
sampleProduct.setDefaultPriceObject(samplePrice);
products[1] = sampleProduct;
sampleProduct = new Product();
samplePrice = new Price();
sampleProduct.setName("apple Music+");
sampleProduct.setId("music");
samplePrice.setCurrency("usd");
samplePrice.setUnitAmountDecimal(BigDecimal.valueOf(499));
sampleProduct.setDefaultPriceObject(samplePrice);
products[2] = sampleProduct;
}
public static Product getProduct(String id) {
if ("shoe".equals(id)) {
return products[0];
} else if ("slippers".equals(id)) {
return products[1];
} else if ("music".equals(id)) {
return products[2];
} else return new Product();
}
}
这将初始化一个产品数组,并允许您使用其标识符 (ID) 查询产品数据。您还需要创建一个 (数据传输对象),以便 Spring Boot 自动序列化从客户端传入的有效载荷,并为您提供一个简单的对象来访问数据。为此,请创建一个新文件 RequestDTO.java,并粘贴以下代码:
package com.kinsta.stripejava.backend;
import com.stripe.model.Product;
public class RequestDTO {
Product[] items;
String customerName;
String customerEmail;
public Product[] getItems() {
return items;
}
public String getCustomerName() {
return customerName;
}
public String getCustomerEmail() {
return customerEmail;
}
}
该文件定义了一个 ,其中包含客户姓名、电子邮件和他们结账的项目列表。
最后,实现 CustomerUtil.findOrCreateCustomer() *** ,以便在 Stripe 中创建尚未存在的客户对象。为此,请创建一个名为 CustomerUtil 的文件,并添加以下代码:
package com.kinsta.stripejava.backend;
import com.stripe.exception.StripeException;
import com.stripe.model.Customer;
import com.stripe.model.CustomerSearchResult;
import com.stripe.param.CustomerCreateParams;
import com.stripe.param.CustomerSearchParams;
public class CustomerUtil {
public static Customer findCustomerByEmail(String email) throws StripeException {
CustomerSearchParams params =
CustomerSearchParams
.builder()
.setQuery("email:'" + email + "'")
.build();
CustomerSearchResult result = Customer.search(params);
return result.getData().size() > 0 ? result.getData().get(0) : null;
}
public static Customer findOrCreateCustomer(String email, String name) throws StripeException {
CustomerSearchParams params =
CustomerSearchParams
.builder()
.setQuery("email:'" + email + "'")
.build();
CustomerSearchResult result = Customer.search(params);
Customer customer;
// If no existing customer was found, create a new record
if (result.getData().size() == 0) {
CustomerCreateParams customerCreateParams = CustomerCreateParams.builder()
.setName(name)
.setEmail(email)
.build();
customer = Customer.create(customerCreateParams);
} else {
customer = result.getData().get(0);
}
return customer;
}
}
该类还包含另一个 *** findCustomerByEmail ,可以使用电子邮件地址在 Stripe 中查找客户。 用于查找 Stripe 数据库中的客户记录,而 则用于根据需要创建客户记录。
这样,托管结账流程所需的后台设置就完成了。现在,您可以在集成开发环境或独立终端中运行前端和后端应用程序来测试应用程序。下面是成功流程的样子:
成功的托管结账流程
在测试 Stripe 集成时,您可以使用以下银行卡详细信息来模拟银行卡交易:
-
- Card Number: 4111 1111 1111 1111
- Expiry Month & Year: 12 / 25
- CVV: 任何三位数字
- Name on Card: Any Name
如果您选择取消交易而不是付款,失败流程如下:
失败的托管结账流程
这就完成了在应用程序中内置 Stripe 托管结账体验的设置。您可以查看 ,进一步了解如何自定义结账页面、收集客户的更多详细信息等。
集成结账
集成结账体验是指构建一个支付流程,它不会将用户重定向到应用程序之外(就像在托管结账流程中那样),而是在应用程序中显示支付表单。
打造集成结账体验意味着要处理客户的支付详情,这涉及到信用卡号、google Pay ID 等敏感信息。并非所有应用程序都能安全地处理这些数据。
为了减轻满足 PCI-DSS 等标准的负担,Stripe 提供了一些,您可以在应用程序中使用这些元素来收集支付详情,同时还可以让 Stripe 管理安全问题,并在其端安全地处理支付。
构建前端
首先,在前端应用程序中安装 ,在前端目录下运行以下命令即可访问 Stripe 元素:
npm i @stripe/react-stripe-js @stripe/stripe-js
接下来,在 frontend/src/routes 目录中新建一个名为 IntegratedCheckout.tsx 的文件,并保存以下代码:
import {Button, Center, Heading, Input, VStack} from "@chakra-ui/react";
import {useEffect, useState} from "react";
import CartItem, {ItemData} from "../components/CartItem.tsx";
import TotalFooter from "../components/TotalFooter.tsx";
import {Products} from '../data.ts'
import {Elements, PaymentElement, useElements, useStripe} from '@stripe/react-stripe-js';
import {loadStripe, Stripe} from '@stripe/stripe-js';
function IntegratedCheckout() {
const [items] = useState<ItemData[]>(Products)
const [transactionClientSecret, setTransactionClientSecret] = useState("")
const [stripePromise, setStripePromise] = useState<Promise<Stripe | null> | null>(null)
const [name, setName] = useState("")
const [email, setEmail] = useState("")
const onCustomerNameChange = (ev: React.ChangeEvent<HTMLInputElement>) => {
setName(ev.target.value)
}
const onCustomerEmailChange = (ev: React.ChangeEvent<HTMLInputElement>) => {
setEmail(ev.target.value)
}
useEffect(() => {
// Make sure to call `loadStripe` outside of a component’s render to avoid
// recreating the `Stripe` object on every render.
setStripePromise(loadStripe(process.env.VITE_STRIPE_API_KEY || ""));
}, [])
const createTransactionSecret = () => {
fetch(process.env.VITE_SERVER_BASE_URL + "/checkout/integrated", {
method: "POST",
headers: {'Content-Type': 'application/json'},
body:  *** ON.stringify({
items: items.map(elem => ({name: elem.name, id: elem.id})),
customerName: name,
customerEmail: email,
})
})
.then(r => r.text())
.then(r => {
setTransactionClientSecret(r)
})
}
return <>
<Center h={'100vh'} color='black'>
<VStack spacing='24px'>
<Heading>Integrated Checkout Example</Heading>
{items.map(elem => {
return <CartItem data={elem} mode={'checkout'}/>
})}
<TotalFooter total={30} mode={"checkout"}/>
<Input variant='filled' placeholder='Customer Name' onChange={onCustomerNameChange}
value={name}/>
<Input variant='filled' placeholder='Customer Email' onChange={onCustomerEmailChange}
value={email}/>
<Button onClick={createTransactionSecret} colorScheme={'green'}>Initiate Payment</Button>
{(transactionClientSecret === "" ?
<></>
: <Elements stripe={stripePromise} options={{clientSecret: transactionClientSecret}}>
<CheckoutForm/>
</Elements>)}
</VStack>
</Center>
</>
}
const CheckoutForm = () => {
const stripe = useStripe();
const elements = useElements();
const handleSubmit = async (event: React.MouseEvent<HTMLButtonElement>) => {
event.preventDefault();
if (!stripe || !elements) {
return;
}
const result = await stripe.confirmPayment({
elements,
confirmParams: {
return_url: process.env.VITE_CLIENT_BASE_URL + "/success",
},
});
if (result.error) {
console.log(result.error.message);
}
};
return <>
<VStack>
<PaymentElement/>
<Button colorScheme={'green'} disabled={!stripe} onClick={handleSubmit}>Pay</Button>
</VStack>
</>
}
export default IntegratedCheckout
该文件定义了两个组件: IntegratedCheckout 和 CheckoutForm 。 CheckoutForm 定义了一个简单的表单,其中包含一个来自 Stripe 的 PaymentElement (用于收集客户的付款详细信息)和一个 Pay(用于触发收款请求)按钮。
该组件还调用了 useStripe() 和 useElements() 钩子,以创建一个 Stripe SDK 实例,用于创建付款请求。一旦点击 Pay 按钮,Stripe SDK 中的 stripe.confirmPayment() *** 就会被调用,该 *** 会从元素实例中收集用户的支付数据,并将其发送到 Stripe 后台,如果交易成功,还会重定向到一个成功 URL。
结账表单与页面的其他部分是分开的,因为需要在 Elements 提供程序的上下文中调用 useStripe() 和 useElements() 钩子,这已在 IntegratedCheckout 的返回语句中完成。如果将 Stripe 挂钩调用直接移至 IntegratedCheckout 组件,它们就会超出 Elements 提供程序的范围,从而无法运行。
IntegratedCheckout 组件重复使用 CartItem 和 TotalFooter 组件来显示购物车中的项目和总金额。它还显示了两个用于收集客户信息的输入字段和一个 Initiate payment 按钮,该按钮会向 Java 后端服务器发送请求,以便使用客户和购物车详细信息创建客户密匙。收到客户密匙后,就会显示 CheckoutForm,处理收集客户付款信息的工作。
除此之外,useEffect 用于调用 loadStripe *** 。该效果只在组件渲染时运行一次,这样在更新组件内部状态时就不会多次加载 Stripe SDK。
要运行上述代码,您还需要在前端项目中添加两个新的环境变量: VITE_STRIPE_API_KEY 和 VITE_CLIENT_BASE_URL。Stripe API 密钥变量将保存来自 的可发布 API 密钥,而客户端基础 URL 变量将包含客户端应用程序(即前端应用程序本身)的链接,以便将其传递给 Stripe SDK,用于处理成功和失败重定向。
为此,请在前台目录下的 .env 文件中添加以下代码:
VITE_STRIPE_API_KEY=pk_test_xxxxxxxxxx # Your key here
VITE_CLIENT_BASE_URL=http://localhost:5173
最后,更新 App.tsx 文件,在前端应用程序的 /integrated-checkout 路由中加入 IntegratedCheckout 组件。在 App 组件中传给 createBrowserRouter 调用的数组中添加以下代码:
       {
path: '/integrated-checkout',
element: (
<IntegratedCheckout/>
)
},
至此,前端所需的设置就完成了。接下来,在后端服务器上创建一个新路由,用于创建客户端密钥,以处理前端应用程序上的集成结账会话。
构建后端
为了确保前端集成不会被攻击者滥用(因为前端代码比后端更容易破解),Stripe 要求您在后端服务器上生成唯一的客户密钥,并用后端生成的客户密钥验证每个集成支付请求,以确保确实是您的应用程序在尝试收款。为此,您需要在后台设置另一条路径,根据客户和购物车信息创建客户密钥。
为了在服务器上创建客户密钥,请在 PaymentController 类中创建一个名为 integratedCheckout 的新 *** ,并保存以下代码:
@PostMapping("/checkout/integrated")
String integratedCheckout(@RequestBody RequestDTO requestDTO) throws StripeException {
Stripe.apiKey = STRIPE_API_KEY;
// Start by finding existing customer or creating a new one if needed
Customer customer = CustomerUtil.findOrCreateCustomer(requestDTO.getCustomerEmail(), requestDTO.getCustomerName());
// Create a PaymentIntent and send it's client secret to the client
PaymentIntentCreateParams params =
PaymentIntentCreateParams.builder()
.setAmount(Long.parseLong(calculateOrderAmount(requestDTO.getItems())))
.setCurrency("usd")
.setCustomer(customer.getId())
.setAutomaticPaymentMethods(
PaymentIntentCreateParams.AutomaticPaymentMethods
.builder()
.setEnabled(true)
.build()
)
.build();
PaymentIntent paymentIntent = PaymentIntent.create(params);
// Send the client secret from the payment intent to the client
return paymentIntent.getClientSecret();
}
与使用构建器类(该类接受付款请求的配置)构建结账会话的方式类似,集成结账流程也要求您构建一个包含金额、货币和付款方式的付款会话。与结账会话不同的是,除非创建发票,否则与支付会话关联起来,这一点您将在本教程后面的章节中学习。
由于您没有将细列项目传递给结账会话生成器,因此需要手动计算购物车项目的总金额,并将金额发送到 Stripe 后台。使用 ProductDAO 查找并添加购物车中每个产品的价格。
为此,请定义一个新 *** calculateOrderAmount 并添加以下代码:
     static String calculateOrderAmount(Product[] items) {
long total = 0L;
for (Product item: items) {
// Look up the application database to find the prices for the products in the given list
total += ProductDAO.getProduct(item.getId()).getDefaultPriceObject().getUnitAmountDecimal().floatValue();
}
return String.valueOf(total);
}
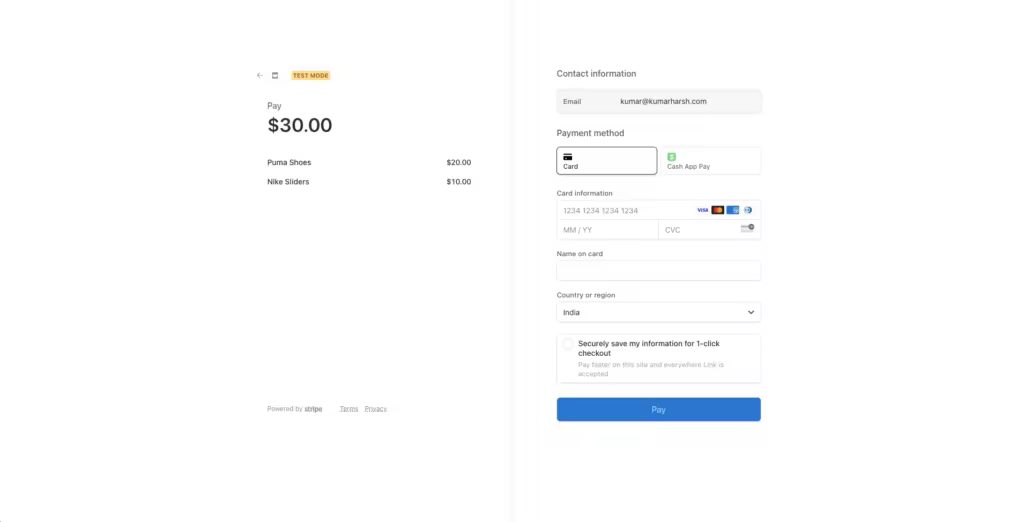
这样就可以在前台和后台设置集成结账流程了。您可以重新启动服务器和客户端的开发服务器,并在前端应用程序中试用新的集成结账流程。下面是集成流程的外观:

综合结账流程
这就完成了应用程序中的基本集成结账流程。现在,您可以进一步查阅 Stripe 文档,或集成更多组件,以帮助您完成、、等其他操作!
为经常 *** 设置订阅
如今,网上商店提供的一种常见服务就是订阅。无论您是要建立一个服务市场,还是要定期提供数字产品,与一次性购买相比,订阅都是让客户以小额费用定期访问您的服务的完美解决方案。
Stripe 可以帮助您轻松设置和取消订阅。您还可以将免费试用作为订阅的一部分,这样用户就可以在承诺使用之前试用您的产品。
设置新订阅
使用托管结账流程设置新订阅非常简单。您只需在构建结账请求时更改几个参数,然后创建一个新页面(通过重复使用现有组件)来显示新订阅的结账页面。首先,在前端 components 文件夹中创建 NewSubscription.tsx 文件。在其中粘贴以下代码:
import {Center, Heading, VStack} from "@chakra-ui/react";
import {useState} from "react";
import CartItem, {ItemData} from "../components/CartItem.tsx";
import TotalFooter from "../components/TotalFooter.tsx";
import CustomerDetails from "../components/CustomerDetails.tsx";
import {Subscriptions} from "../data.ts";
function NewSubscription() {
const [items] = useState<ItemData[]>(Subscriptions)
return <>
<Center h={'100vh'} color='black'>
<VStack spacing='24px'>
<Heading>New Subscription Example</Heading>
{items.map(elem => {
return <CartItem data={elem} mode={'subscription'}/>
})}
<TotalFooter total={4.99} mode={"subscription"}/>
<CustomerDetails data={items} endpoint={"/subscriptions/new"} />
</VStack>
</Center>
</>
}
export default NewSubscription
在上面的代码中,购物车数据取自 data.ts 文件,其中只包含一个项目,以简化流程。在实际应用中,您可以在一个订阅订单中包含多个项目。
要在正确的路由上呈现该组件,请在 App.tsx 组件中传递给 createBrowserRouter 调用的数组中添加以下代码:
       {
path: '/new-subscription',
element: (
<NewSubscription/>
)
},
至此,前端所需的设置全部完成。在后台,创建新路由 /subscription/new ,为订阅产品创建新的托管结账会话。在 backend/src/main/java/com/kinsta/stripejava/backend 目录中创建 newSubscription *** ,并保存以下代码:
@PostMapping("/subscriptions/new")
String newSubscription(@RequestBody RequestDTO requestDTO) throws StripeException {
Stripe.apiKey = STRIPE_API_KEY;
String clientBaseURL = System.getenv().get("CLIENT_BASE_URL");
// Start by finding existing customer record from Stripe or creating a new one if needed
Customer customer = CustomerUtil.findOrCreateCustomer(requestDTO.getCustomerEmail(), requestDTO.getCustomerName());
// Next, create a checkout session by adding the details of the checkout
SessionCreateParams.Builder paramsBuilder =
SessionCreateParams.builder()
// For subscriptions, you need to set the mode as subscription
.setMode(SessionCreateParams.Mode.SUBSCRIPTION)
.setCustomer(customer.getId())
.setSuccessUrl(clientBaseURL + "/success?session_id={CHECKOUT_SESSION_ID}")
.setCancelUrl(clientBaseURL + "/failure");
for (Product product : requestDTO.getItems()) {
paramsBuilder.addLineItem(
SessionCreateParams.LineItem.builder()
.setQuantity(1L)
.setPriceData(
PriceData.builder()
.setProductData(
PriceData.ProductData.builder()
.putMetadata("app_id", product.getId())
.setName(product.getName())
.build()
)
.setCurrency(ProductDAO.getProduct(product.getId()).getDefaultPriceObject().getCurrency())
.setUnitAmountDecimal(ProductDAO.getProduct(product.getId()).getDefaultPriceObject().getUnitAmountDecimal())
// For subscriptions, you need to provide the details on how often they would recur
.setRecurring(PriceData.Recurring.builder().setInterval(PriceData.Recurring.Interval.MONTH).build())
.build())
.build());
}
Session session = Session.create(paramsBuilder.build());
return session.getUrl();
}
该 *** 中的代码与 hostedCheckout *** 中的代码非常相似,不同之处在于创建会话的模式是订阅而不是产品,而且在创建会话之前,还要为订阅的重复间隔设置一个值。
这指示 Stripe 将此结账视为订阅结账,而不是一次性付款。与 hostedCheckout *** 类似,该 *** 也会将托管结账页面的 URL 作为 HTTP 响应返回给客户端。客户端将重定向到收到的 URL,以便客户完成支付。
您可以重新启动客户端和服务器的开发服务器,查看新订阅页面的运行情况。如下所示:
托管订阅结账流程
取消现有订阅
既然知道了如何创建新订阅,我们来学习如何让客户取消现有订阅。由于本教程中构建的演示应用程序不包含任何身份验证设置,因此请使用表单让客户输入电子邮件以查询其订阅,然后为每个订阅项目提供一个取消按钮,以便用户取消订阅。
为此,您需要执行以下操作:
- 更新
CartItem组件,以便在取消订阅页面上显示取消按钮。 - 创建一个
CancelSubscription组件,首先显示一个输入框和一个按钮,让客户使用其电子邮件地址搜索订阅,然后使用更新后的CartItem组件显示订阅列表。 - 在后台服务器中创建一个新 *** ,可以使用客户的电子邮件地址从 Stripe 后台查找订阅。
- 在后台服务器中创建一个新 *** ,该 *** 可以根据传递给它的订阅 ID 取消订阅。
首先更新 CartItem 组件,使其看起来像这样:
// Existing imports here
function CartItem(props: CartItemProps) {
// Add this hook call and the cancelSubscription method to cancel the selected subscription
const toast = useToast()
const cancelSubscription = () => {
fetch(process.env.VITE_SERVER_BASE_URL + "/subscriptions/cancel", {
method: "POST",
headers: {'Content-Type': 'application/json'},
body:  *** ON.stringify({
subscriptionId: props.data.stripeSubscriptionData?.subscriptionId
})
})
.then(r => r.text())
.then(() => {
toast({
title: 'Subscription cancelled.',
description: "We've cancelled your subscription for you.",
status: 'success',
duration: 9000,
isClosable: true,
})
if (props.onCancelled)
props.onCancelled()
})
}
return <Card direction={{base: 'column',  *** : 'row'}}
overflow='hidden'
width={'xl'}
variant='outline'>
<Image
objectFit='cover'
maxW={{base: '100%',  *** : '200px'}}
src={props.data.image}
/>
<Stack mt='6' spacing='3'>
<CardBody>
<VStack spacing={'3'} alignItems={"flex-start"}>
<Heading size='md'>{props.data.name}</Heading>
<VStack spacing={'1'} alignItems={"flex-start"}>
<Text>
{props.data.description}
</Text>
{(props.mode === "checkout" ? <Text>
{"Quantity: " + props.data.quantity}
</Text> : <></>)}
</VStack>
{/* <----------------------- Add this block ----------------------> */}
{(props.mode === "subscription" && props.data.stripeSubscriptionData ?
<VStack spacing={'1'} alignItems={"flex-start"}>
<Text>
{"Next Payment Date: " + props.data.stripeSubscriptionData.nextPaymentDate}
</Text>
<Text>
{"Subscribed On: " + props.data.stripeSubscriptionData.subscribedOn}
</Text>
{(props.data.stripeSubscriptionData.trialEndsOn ? <Text>
{"Free Trial Running Until: " + props.data.stripeSubscriptionData.trialEndsOn}
</Text> : <></>)}
</VStack> : <></>)}
</VStack>
</CardBody>
<CardFooter>
<VStack alignItems={'flex-start'}>
<Text color='blue.600' fontSize='2xl'>
{"$" + props.data.price}
</Text>
{/* <----------------------- Add this block ----------------------> */}
{(props.data.stripeSubscriptionData ?
<Button colorScheme={'red'} onClick={cancelSubscription}>Cancel Subscription</Button>
: <></>)}
</VStack>
</CardFooter>
</Stack>
</Card>
}
// Existing types here
export default CartItem
接下来,在前台 routes 目录中创建 CancelSubscription.tsx 组件,并保存以下代码:
import {Button, Center, Heading, Input, VStack} from "@chakra-ui/react";
import {useState} from "react";
import CartItem, {ItemData, ServerSubscriptionsResponseType} from "../components/CartItem.tsx";
import {Subscriptions} from "../data.ts";
function CancelSubscription() {
const [email, setEmail] = useState("")
const [subscriptions, setSubscriptions] = useState<ItemData[]>([])
const onCustomerEmailChange = (ev: React.ChangeEvent<HTMLInputElement>) => {
setEmail(ev.target.value)
}
const listSubscriptions = () => {
fetch(process.env.VITE_SERVER_BASE_URL + "/subscriptions/list", {
method: "POST",
headers: {'Content-Type': 'application/json'},
body:  *** ON.stringify({
customerEmail: email,
})
})
.then(r => r.json())
.then((r: ServerSubscriptionsResponseType[]) => {
const subscriptionsList: ItemData[] = []
r.forEach(subscriptionItem => {
let subscriptionDetails = Subscriptions.find(elem => elem.id === subscriptionItem.appProductId) || undefined
if (subscriptionDetails) {
subscriptionDetails = {
...subscriptionDetails,
price: Number.parseInt(subscriptionItem.price) / 100,
stripeSubscriptionData: subscriptionItem,
}
subscriptionsList.push(subscriptionDetails)
} else {
console.log("Item not found!")
}
})
setSubscriptions(subscriptionsList)
})
}
const removeSubscription = (id: string | undefined) => {
const newSubscriptionsList = subscriptions.filter(elem => (elem.stripeSubscriptionData?.subscriptionId !== id))
setSubscriptions(newSubscriptionsList)
}
return <>
<Center h={'100vh'} color='black'>
<VStack spacing={3} width={'xl'}>
<Heading>Cancel Subscription Example</Heading>
{(subscriptions.length === 0 ? <>
<Input variant='filled' placeholder='Customer Email' onChange={onCustomerEmailChange}
value={email}/>
<Button onClick={listSubscriptions} colorScheme={'green'}>List Subscriptions</Button>
</> : <></>)}
{subscriptions.map(elem => {
return <CartItem data={elem} mode={'subscription'} onCancelled={() => removeSubscription(elem.stripeSubscriptionData?.subscriptionId)}/>
})}
</VStack>
</Center>
</>
}
export default CancelSubscription
该组件显示一个输入框和一个按钮,供客户输入电子邮件并开始查找订阅。如果找到订阅,输入框和按钮将被隐藏,屏幕上将显示订阅列表。对于每个订阅项目,组件都会传递一个 removeSubscription *** ,请求 Java 后端服务器取消 Stripe 后端的订阅。
要将其附加到前端应用程序上的 /cancel-subscription 路由,请在 App 组件中传递给 createBrowserRouter 调用的数组中添加以下代码:
       {
path: '/cancel-subscription',
element: (
<CancelSubscription/>
)
},
要在后端服务器上搜索订阅,请在后端项目的 PaymentController 类中添加一个 viewSubscriptions *** ,内容如下:
@PostMapping("/subscriptions/list")
List<Map<String, String>> viewSubscriptions(@RequestBody RequestDTO requestDTO) throws StripeException {
Stripe.apiKey = STRIPE_API_KEY;
// Start by finding existing customer record from Stripe
Customer customer = CustomerUtil.findCustomerByEmail(requestDTO.getCustomerEmail());
// If no customer record was found, no subscriptions exist either, so return an empty list
if (customer == null) {
return new ArrayList<>();
}
// Search for subscriptions for the current customer
SubscriptionCollection subscriptions = Subscription.list(
SubscriptionListParams.builder()
.setCustomer(customer.getId())
.build());
List<Map<String, String>> response = new ArrayList<>();
// For each subscription record, query its item records and collect in a list of objects to send to the client
for (Subscription subscription : subscriptions.getData()) {
SubscriptionItemCollection currSubscriptionItems =
SubscriptionItem.list(SubscriptionItemListParams.builder()
.setSubscription(subscription.getId())
.addExpand("data.price.product")
.build());
for (SubscriptionItem item : currSubscriptionItems.getData()) {
HashMap<String, String> subscriptionData = new HashMap<>();
subscriptionData.put("appProductId", item.getPrice().getProductObject().getMetadata().get("app_id"));
subscriptionData.put("subscriptionId", subscription.getId());
subscriptionData.put("subscribedOn", new SimpleDateFormat("dd/MM/yyyy").format(new Date(subscription.getStartDate() * 1000)));
subscriptionData.put("nextPaymentDate", new SimpleDateFormat("dd/MM/yyyy").format(new Date(subscription.getCurrentPeriodEnd() * 1000)));
subscriptionData.put("price", item.getPrice().getUnitAmountDecimal().toString());
if (subscription.getTrialEnd() != null && new Date(subscription.getTrialEnd() * 1000).after(new Date()))
subscriptionData.put("trialEndsOn", new SimpleDateFormat("dd/MM/yyyy").format(new Date(subscription.getTrialEnd() * 1000)));
response.add(subscriptionData);
}
}
return response;
}
上述 *** 首先在 Stripe 中找到给定用户的客户对象。然后,搜索客户的活动订阅。收到订阅列表后,提取其中的项目,并在应用程序产品数据库中找到相应的产品发送给前端。这一点很重要,因为前台识别应用程序数据库中每个产品的 ID 可能与存储在 Stripe 中的产品 ID 相同,也可能不相同。
最后,在 PaymentController 类中创建 cancelSubscription *** ,并粘贴下面的代码,以便根据传递的订阅 ID 删除订阅。
@PostMapping("/subscriptions/cancel")
String cancelSubscription(@RequestBody RequestDTO requestDTO) throws StripeException {
Stripe.apiKey = STRIPE_API_KEY;
Subscription subscription =
Subscription.retrieve(
requestDTO.getSubscriptionId()
);
Subscription deletedSubscription =
subscription.cancel();
return deletedSubscription.getStatus();
}
该 *** 从 Stripe 获取订阅对象,调用取消 *** ,然后将订阅状态返回给客户端。不过,要运行此 *** ,需要更新 DTO 对象以添加 subscriptionId 字段。为此,请在 RequestDTO 类中添加以下字段和 *** :
package com.kinsta.stripejava.backend;
import com.stripe.model.Product;
public class RequestDTO {
// … other fields …
// Add this
String subscriptionId;
// … other getters …
// Add this
public String getSubscriptionId() {
return subscriptionId;
}
}
添加完成后,您就可以重新运行后台和前台应用程序的开发服务器,查看取消流程的运行情况:
订阅取消流程
为零价值交易订阅设置免费试用期
大多数现代订阅的一个共同特点是,在向用户收费之前提供一个短暂的免费试用期。这可以让用户在不投资的情况下了解产品或服务。不过,更好在客户注册免费试用期时存储他们的付款详细信息,以便在试用期结束后立即向他们收费。
Stripe 大大简化了此类订阅的创建。首先,在 frontend/routes 目录中生成一个名为 SubscriptionWithTrial.tsx 的新组件,然后粘贴以下代码:
import {Center, Heading, VStack} from "@chakra-ui/react";
import {useState} from "react";
import CartItem, {ItemData} from "../components/CartItem.tsx";
import TotalFooter from "../components/TotalFooter.tsx";
import CustomerDetails from "../components/CustomerDetails.tsx";
import {Subscriptions} from "../data.ts";
function SubscriptionWithTrial() {
const [items] = useState<ItemData[]>(Subscriptions)
return <>
<Center h={'100vh'} color='black'>
<VStack spacing='24px'>
<Heading>New Subscription With Trial Example</Heading>
{items.map(elem => {
return <CartItem data={elem} mode={'subscription'}/>
})}
<TotalFooter total={4.99} mode={"trial"}/>
<CustomerDetails data={items} endpoint={"/subscriptions/trial"}/>
</VStack>
</Center>
</>
}
export default SubscriptionWithTrial
该组件重复使用了之前创建的组件。它与 NewSubscription 组件的主要区别在于,它将 TotalFooter 的模式设为 trial,而不是 subscription。这样,TotalFooter 组件就会显示一段文字,说明客户现在可以开始免费试用,但一个月后将收取费用。
要将此组件附加到前端应用程序的 /subscription-with-trial 路由,请在 App 程序组件中传给 createBrowserRouter 调用的数组中添加以下代码:
       {
path: '/subscription-with-trial',
element: (
<SubscriptionWithTrial/>
)
},
要在后台建立 trial 订阅的结账流程,请在 PaymentController 类中创建一个名为 newSubscriptionWithTrial 的新 *** ,并添加以下代码:
    @PostMapping("/subscriptions/trial")
String newSubscriptionWithTrial(@RequestBody RequestDTO requestDTO) throws StripeException {
Stripe.apiKey = STRIPE_API_KEY;
String clientBaseURL = System.getenv().get("CLIENT_BASE_URL");
// Start by finding existing customer record from Stripe or creating a new one if needed
Customer customer = CustomerUtil.findOrCreateCustomer(requestDTO.getCustomerEmail(), requestDTO.getCustomerName());
// Next, create a checkout session by adding the details of the checkout
SessionCreateParams.Builder paramsBuilder =
SessionCreateParams.builder()
.setMode(SessionCreateParams.Mode.SUBSCRIPTION)
.setCustomer(customer.getId())
.setSuccessUrl(clientBaseURL + "/success?session_id={CHECKOUT_SESSION_ID}")
.setCancelUrl(clientBaseURL + "/failure")
// For trials, you need to set the trial period in the session creation request
.setSubscriptionData(SessionCreateParams.SubscriptionData.builder().setTrialPeriodDays(30L).build());
for (Product product : requestDTO.getItems()) {
paramsBuilder.addLineItem(
SessionCreateParams.LineItem.builder()
.setQuantity(1L)
.setPriceData(
PriceData.builder()
.setProductData(
PriceData.ProductData.builder()
.putMetadata("app_id", product.getId())
.setName(product.getName())
.build()
)
.setCurrency(ProductDAO.getProduct(product.getId()).getDefaultPriceObject().getCurrency())
.setUnitAmountDecimal(ProductDAO.getProduct(product.getId()).getDefaultPriceObject().getUnitAmountDecimal())
.setRecurring(PriceData.Recurring.builder().setInterval(PriceData.Recurring.Interval.MONTH).build())
.build())
.build());
}
Session session = Session.create(paramsBuilder.build());
return session.getUrl();
}
这段代码与 newSubscription *** 非常相似。唯一(也是最重要的)不同之处在于,会话创建参数对象中传递的试用期值为 30,表示免费试用期为 30 天。
现在,您可以保存更改并重新运行后端和前端的开发服务器,查看带有免费试用期的订阅工作流的运行情况:
订阅免费试用流程
为付款生成发票
对于订阅,Stripe 会自动为每次付款生成发票,即使是试用注册的零金额交易也不例外。对于一次性付款,您可以根据需要选择创建发票。
要开始将所有付款与发票关联起来,请更新前端应用程序中 CustomerDetails 组件的 initiatePayment 函数中发送的支付负载的正文,使其包含以下属性:
invoiceNeeded: true
您还需要在 IntegratedCheckout 组件的 createTransactionSecret 函数中发送到服务器的有效载荷正文中添加此属性。
接下来,更新后端路由以检查此新属性,并相应地更新 Stripe SDK 调用。
对于托管结账 *** ,要添加发票功能,请更新 hostedCheckout *** ,添加以下代码行:
@PostMapping("/checkout/hosted")
String hostedCheckout(@RequestBody RequestDTO requestDTO) throws StripeException {
// … other operations being done after creating the SessionCreateParams builder instance
// Add the following block of code just before the SessionCreateParams are built from the builder instance
if (requestDTO.isInvoiceNeeded()) {
paramsBuilder.setInvoiceCreation(SessionCreateParams.InvoiceCreation.builder().setEnabled(true).build());
}
Session session = Session.create(paramsBuilder.build());
return session.getUrl();
}
这将检查 invoiceNeeded 字段,并相应设置创建参数。
为集成付款添加发票略显麻烦。你不能简单地设置一个参数,指示 Stripe 自动为付款创建发票。您必须手动创建发票,然后创建一个链接的付款意向。
如果支付意向成功支付并完成,发票就会被标记为已支付;否则,发票仍未支付。虽然这在逻辑上说得通,但实施起来可能有点复杂(尤其是在没有明确示例或参考资料可循的情况下)。
要实现这一点,请更新 integratedCheckout *** ,使其看起来像这样:
String integratedCheckout(@RequestBody RequestDTO requestDTO) throws StripeException {
Stripe.apiKey = STRIPE_API_KEY;
// Start by finding an existing customer or creating a new one if needed
Customer customer = CustomerUtil.findOrCreateCustomer(requestDTO.getCustomerEmail(), requestDTO.getCustomerName());
PaymentIntent paymentIntent;
if (!requestDTO.isInvoiceNeeded()) {
// If the invoice is not needed, create a PaymentIntent directly and send it to the client
PaymentIntentCreateParams params =
PaymentIntentCreateParams.builder()
.setAmount(Long.parseLong(calculateOrderAmount(requestDTO.getItems())))
.setCurrency("usd")
.setCustomer(customer.getId())
.setAutomaticPaymentMethods(
PaymentIntentCreateParams.AutomaticPaymentMethods
.builder()
.setEnabled(true)
.build()
)
.build();
paymentIntent = PaymentIntent.create(params);
} else {
// If invoice is needed, create the invoice object, add line items to it, and finalize it to create the PaymentIntent automatically
InvoiceCreateParams invoiceCreateParams = new InvoiceCreateParams.Builder()
.setCustomer(customer.getId())
.build();
Invoice invoice = Invoice.create(invoiceCreateParams);
// Add each item to the invoice one by one
for (Product product : requestDTO.getItems()) {
// Look for existing Product in Stripe before creating a new one
Product stripeProduct;
ProductSearchResult results = Product.search(ProductSearchParams.builder()
.setQuery("metadata['app_id']:'" + product.getId() + "'")
.build());
if (results.getData().size() != 0)
stripeProduct = results.getData().get(0);
else {
// If a product is not found in Stripe database, create it
ProductCreateParams productCreateParams = new ProductCreateParams.Builder()
.setName(product.getName())
.putMetadata("app_id", product.getId())
.build();
stripeProduct = Product.create(productCreateParams);
}
// Create an invoice line item using the product object for the line item
InvoiceItemCreateParams invoiceItemCreateParams = new InvoiceItemCreateParams.Builder()
.setInvoice(invoice.getId())
.setQuantity(1L)
.setCustomer(customer.getId())
.setPriceData(
InvoiceItemCreateParams.PriceData.builder()
.setProduct(stripeProduct.getId())
.setCurrency(ProductDAO.getProduct(product.getId()).getDefaultPriceObject().getCurrency())
.setUnitAmountDecimal(ProductDAO.getProduct(product.getId()).getDefaultPriceObject().getUnitAmountDecimal())
.build())
.build();
InvoiceItem.create(invoiceItemCreateParams);
}
// Mark the invoice as final so that a PaymentIntent is created for it
invoice = invoice.finalizeInvoice();
// Retrieve the payment intent object from the invoice
paymentIntent = PaymentIntent.retrieve(invoice.getPaymentIntent());
}
// Send the client secret from the payment intent to the client
return paymentIntent.getClientSecret();
}
该 *** 的旧代码被移到 if 代码块中,用于检查 invoiceNeeded 字段是否为 false。如果为 true,该 *** 就会创建一张包含发票项目的发票,并将其标记为最终完成,以便付款。
然后,它会检索发票最终确定时自动创建的付款意向,并将该付款意向中的客户秘密发送给客户。一旦客户完成集成结账流程,付款就会被收取,发票也会被标记为已付款。
这样就完成了开始从应用程序生成发票所需的设置。您可以前往 Stripe 仪表板上的,查看应用程序在每次购买和订阅付款时生成的发票。
不过,Stripe 还允许您通过 API 访问发票,为客户提供自助服务体验,让他们随时下载发票。
为此,请在 frontend/routes 目录中创建一个名为 ViewInvoices.tsx 的新组件。在其中粘贴以下代码:
import {Button, Card, Center, Heading, HStack, IconButton, Input, Text, VStack} from "@chakra-ui/react";
import {useState} from "react";
import {DownloadIcon} from "@chakra-ui/icons";
function ViewInvoices() {
const [email, setEmail] = useState("")
const [invoices, setInvoices] = useState<InvoiceData[]>([])
const onCustomerEmailChange = (ev: React.ChangeEvent<HTMLInputElement>) => {
setEmail(ev.target.value)
}
const listInvoices = () => {
fetch(process.env.VITE_SERVER_BASE_URL + "/invoices/list", {
method: "POST",
headers: {'Content-Type': 'application/json'},
body:  *** ON.stringify({
customerEmail: email,
})
})
.then(r => r.json())
.then((r: InvoiceData[]) => {
setInvoices(r)
})
}
return <>
<Center h={'100vh'} color='black'>
<VStack spacing={3} width={'xl'}>
<Heading>View Invoices for Customer</Heading>
{(invoices.length === 0 ? <>
<Input variant='filled' placeholder='Customer Email' onChange={onCustomerEmailChange}
value={email}/>
<Button onClick={listInvoices} colorScheme={'green'}>Look up Invoices</Button>
</> : <></>)}
{invoices.map(elem => {
return <Card direction={{base: 'column',  *** : 'row'}}
overflow='hidden'
alignItems={'center'}
justifyContent={'space-between'}
padding={'8px'}
width={500}
variant='outline'>
<Text>
{elem.number}
</Text>
<HStack spacing={"3"}>
<Text color='blue.600' fontSize='2xl'>
{"$" + elem.amount}
</Text>
<IconButton onClick={() => {
window.location.href = elem.url
}} icon={<DownloadIcon/>} aria-label={'Download invoice'}/>
</HStack>
</Card>
})}
</VStack>
</Center>
</>
}
interface InvoiceData {
number: string,
amount: string,
url: string
}
export default ViewInvoices
与 CancelSubscription 组件类似,该组件显示一个供客户输入电子邮件的输入框和一个搜索发票的按钮。一旦找到发票,输入字段和按钮就会隐藏,并向客户显示包含发票编号、总金额和下载发票 PDF 按钮的发票列表。
要实现搜索给定客户的发票并发送相关信息(发票编号、金额和 PDF URL)的后台 *** ,请在后台的 PaymentController 类中添加以下 *** ;
@PostMapping("/invoices/list")
List<Map<String, String>> listInvoices(@RequestBody RequestDTO requestDTO) throws StripeException {
Stripe.apiKey = STRIPE_API_KEY;
// Start by finding existing customer record from Stripe
Customer customer = CustomerUtil.findCustomerByEmail(requestDTO.getCustomerEmail());
// If no customer record was found, no subscriptions exist either, so return an empty list
if (customer == null) {
return new ArrayList<>();
}
// Search for invoices for the current customer
Map<String, Object> invoiceSearchParams = new HashMap<>();
invoiceSearchParams.put("customer", customer.getId());
InvoiceCollection invoices =
Invoice.list(invoiceSearchParams);
List<Map<String, String>> response = new ArrayList<>();
// For each invoice, extract its number, amount, and PDF URL to send to the client
for (Invoice invoice : invoices.getData()) {
HashMap<String, String> map = new HashMap<>();
map.put("number", invoice.getNumber());
map.put("amount", String.valueOf((invoice.getTotal() / 100f)));
map.put("url", invoice.getInvoicePdf());
response.add(map);
}
return response;
}
该 *** 首先根据提供的电子邮件地址查找客户。然后,查找该客户已标记为已付款的发票。一旦找到发票列表,它就会提取发票号码、金额和 PDF URL,并将这些信息的列表发送回客户应用程序。
这就是发票流程的样子:
查看发票
至此,我们的 Java 应用程序(和)演示开发完成。在下一节中,您将学习如何将此应用程序部署到 Kinsta,以便在线访问。
将应用程序部署到 Kinsta
应用程序准备就绪后,您就可以将其部署到 Kinsta。Kinsta 支持从您偏好的 git 提供商(Bitbucket、github 或 GitLab)进行部署。将应用程序的源代码库连接到 Kinsta,每当代码有变动时,它就会自动部署应用程序。
准备项目
要将应用程序部署到生产环境,请确定 Kinsta 将使用的构建和部署命令。对于前端,请确保 package.json 文件中定义了以下脚本:
"scripts": {
"dev": "vite",
"build": "NODE_ENV=production tsc && vite build",
"start": "serve ./dist",
"lint": "eslint . --ext ts,tsx --report-unused-disable-directives --max-warnings 0",
"preview": "vite preview"
},
您还需要安装 npm 软件包,以便为静态网站提供服务。该软件包将用于在 Kinsta 部署环境中为应用程序的生产构建提供服务。运行以下命令即可安装:
npm i serve
使用 vite 构建应用程序后,整个应用程序将打包成一个文件 index.html,因为本教程中使用的 React 配置旨在创建单页面应用程序。虽然这不会对用户造成很大影响,但您需要设置一些额外的配置来处理此类应用程序中的浏览器路由和导航。
在当前配置下,您只能通过部署的基本 URL 访问应用程序。如果部署的基本 URL 是 example.com,那么对 example.com/some-route 的任何请求都会导致 HTTP 404 错误。
这是因为服务器只有一个文件,即 index.html 文件。发送到 example.com/some-route 的请求会开始查找文件 some-route/index.html,但该文件并不存在,因此会收到 404 Not Found 响应。
要解决这个问题,请在 frontend/public 文件夹中创建一个名为 serve.json 的文件,并在其中保存以下代码:
{
"rewrites": [
{ "source": "*", "destination": "/index.html" }
]
}
该文件将指示 serve 重写所有传入请求,使其指向 index.html 文件,同时仍在响应中显示原始请求的发送路径。当 Stripe 将客户重定向回应用程序时,这将帮助你正确提供应用程序的成功和失败页面。
对于后端,创建一个 ,为您的 Java 应用程序设置合适的环境。使用 dockerfile 可以确保为 Java 应用程序提供的环境在所有主机(无论是本地开发主机还是 Kinsta 部署主机)上都是相同的,从而确保应用程序按预期运行。
为此,请在 backend 文件夹中创建一个名为 Dockerfile 的文件,并在其中保存以下内容:
FROM openjdk:22-oraclelinux8
LABEL maintainer="krharsh17"
WORKDIR /app
COPY . /app
RUN ./mvnw clean package
EXPOSE 8080
ENTRYPOINT ["java", "-jar", "/app/target/backend.jar"]
该文件指示运行时使用 Java 映像作为部署容器的基础,运行 ./mvnw clean package 命令来构建应用程序的 JAR 文件,并使用 java -jar <jar-file> 命令来执行该文件。至此,源代码部署到 Kinsta 的准备工作就完成了。
设置 GitHub 资源库
要开始部署应用程序,请创建两个 GitHub 仓库来存放应用程序的源代码。如果使用 GitHub CLI,可以通过终端运行以下命令来完成:
# Run these in the backend folder
gh repo create stripe-payments-java-react-backend --public --source=. --remote=origin
git init
git add .
git commit -m "Initial commit"
git push origin main
# Run these in the frontend folder
gh repo create stripe-payments-java-react-frontend --public --source=. --remote=origin
git init
git add .
git commit -m "Initial commit"
git push origin main
这将在你的账户中创建新的 GitHub 仓库,并将你的应用程序代码推送到这些仓库。您应该可以访问前台和后台仓库。接下来,按照以下步骤将这些仓库部署到 Kinsta:
- 在 面板上登录或创建 Kinsta 帐户。
- 在左侧边栏单击 Applications ,然后单击 Add Application。
- 在出现的模态中,选择要部署的版本库。如果有多个分支,可以选择所需的分支并为应用程序命名。
- 从 25 个选项的列表中选择一个可用的数据中心位置。Kinsta 会自动检测应用程序的启动命令。
请记住,您需要为前台和后台应用程序提供一些环境变量,以便它们正常工作。前台应用程序需要以下环境变量:
- VITE_STRIPE_API_KEY
- VITE_SERVER_BASE_URL
- VITE_CLIENT_BASE_URL
要部署后端应用程序,请完全按照前端的 *** 操作,但在 Build environment 步骤中,请选择 Use Dockerfile to set up container image 单选按钮,并输入 Dockerfile 作为后端应用程序的 Dockerfile 路径。

设置构建环境细节
记住添加后台环境变量:
- CLIENT_BASE_URL
- STRIPE_API_KEY
部署完成后,前往应用程序的详细信息页面,从那里访问部署的 URL。

部署在 Kinsta 上的应用程序的托管 URL
前往 ,获取密钥和可发布 API 密钥。确保向前端应用程序提供 Stripe 可发布密钥(而不是秘钥)。
此外,请确保您的基础 URL 末尾没有尾部正斜线 ( / )。路由已经有前导斜线,因此在基本 URL 末尾添加尾部斜线会导致最终 URL 中添加两个斜线。
对于后台应用程序,请添加 Stripe 面板上的密钥(而不是可发布密钥)。此外,确保客户端 URL 末尾没有尾随的正斜杠 ( / )。
添加变量后,转到应用程序 “Deployments” 选项卡,点击后端应用程序的 redeploy 按钮。这样就完成了通过环境变量为 Kinsta 部署提供凭据所需的一次性设置。
接下来,您就可以将更改提交到版本控制中了。如果您在部署时勾选了选项,Kinsta 会自动重新部署您的应用程序;否则,您需要手动触发重新部署。
小结
在本文中,您已经了解了 Stripe 的工作原理及其提供的支付流程。您还通过一个详细示例了解了如何将 Stripe 集成到 Java 应用程序中,以接受一次性付款、设置订阅、提供免费试用和生成付款发票。
将 Stripe 和 Java 结合使用,您就可以为客户提供一个强大的支付解决方案,该解决方案可以很好地扩展并与您现有的应用程序和工具生态系统无缝集成。
扫描二维码推送至手机访问。
版权声明:本文由2345好导航站长资讯发布,如需转载请注明出处。
“在Spring Boot中集成Stripe的指南” 的相关文章

宝塔面板教程之监控管理篇
宝塔面板另外一个特质是,你无需通过Linux命令行来查看服务器各项指标状况,即可以阿里云服务器类似的可视化图表,查看资源使用、负载、CPU占用及内容使用百分比等指标。 默认监控是关闭,有需要的,可以开启,监控数据默认保存30天,可以自行修改,默认监控数据保存在日志,可手动清理该日志。 监控管理,...

什么是Node.js以及为什么要使用它
JavaScript是世界上最流行的编程语言之一。今天,它为数百万个网站提供支持,并吸引了成群的开发人员和设计人员为Web构建功能。如果您是编程新手,那么 JavaScript很容易成为之一。 在最初的20年里,JavaScript主要用于客户端脚本。由于JavaScript只能在<scr...

揭开Laravel面纱:用于构建Web应用程序的跨平台PHP框架
近年来,Web应用程序和网站的开发变得越来越简单。即使是我们当中最受技术挑战的人也已经相当熟练地使用WordPress和Wix等产品。 对于更高级的开发人员,有许多工具可以帮助简化开发过程。这些工具中最有用的工具之一是Laravel。 本文回答了“什么是Laravel?”这个问题。通过将其分...

XaaS:一切皆服务模型(包含10个示例类别)
有时似乎有太多的商业首字母缩写词要记住。随着快速变化的技术进步和云计算的出现,新的类别将不断涌现。XaaS 就是这样一个最新的补充。 该领域的大多数读者都知道、和。但是你听说过XaaS吗? XaaS(一切皆服务)涵盖了一切:现在一切都可以成为服务。 这听起来好像很复杂的样子,但别担心——我...
PHP 8.2年内将发布,一起来看看都有什么新特征
PHP 8.2预计将于今年11月发布,最新的稳定版本是PHP 8.1.5。虽然现在还为时过早,但对更新的接受程度参差不齐。 但是,知道会发生什么可以帮助您。通过了解新功能和不推荐使用的功能,您可以了解更新可能如何影响开发。这些知识还可以帮助您为最终发布做好准备。 在这篇文章中,我们将回顾最新...
Cloudflare即将完全弃用Host API集成
Cloudflare已宣布弃用HOST API集成,这将影响Cloudflare的传统主机和经销商合作伙伴。 Cloudflare弃用HOST API Cloudflare Legacy Host API将于2022年11月1日正式被弃用。Cloudflare表示,由于支持和维护程序...